How To: Firefighter Shift Scheduling – Part 3
 This is the third part of a multi-part blog post on setting up shift scheduling in TexCom. (Part 1 can be found here)
In this post we will cover how to define our settings for the shift we made in part 2 which will also enhance the look on the calendar. To start, let’s navigate to the settings for this shift by selecting Shift Schedules in admin and then Settings under the shift you created.
Shift Colors
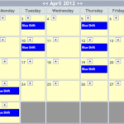
The first step is to select the font color and background color for this shift as you want it to display on the calendar. This is a great way to distinguish this shift from other shifts by having different colors for each. The shift I created was called Blue Shift so I selected a blue background color and a white font color. The sample box shows you how it will look on the calendar.
Shift Locations (Stations)
After the colors are to your satisfaction, we need to set up the locations for this shift. Think of locations as your fire stations. Determine how many stations you have that are encompassed by this shift. If your location is not already listed, select the Add Locations link and enter your location names. My Blue Shift has three people on shift at a time, two at Station #1 and one at Station #2, so I will enter this accordingly. Once Completed, select Save.
General Shift Settings
Now that we have our first shift setup, we want it to be viewable by all users. Select the General Settings link from the main Shift Schedules admin area. Here you can specify how shifts show to your users. Select the options you would like and select Save.
- Display Current Shift in the InfoZone – Indicates the current on duty shift(s) on the home page InfoZone. Allows you to show shift names, users, or both.
- Display Shift Schedule Link in Zones – Puts a link in the Zones area to view the shift schedules on a calendar.
- Display Shift Changes Link in Zones – Once you start allowing your users to create shift changes you can display this link in the Zones area.
- Display Shift Information in Daily Email Alert – Will indicate the current shifts for the next two days in the daily email alert for any users that has Daily Email Alerts on.
Page 1 of 2 | Next page

